Dressing is a complex skill. Children need to have mastered physical skills with sitting balance, hand-eye coordination and two-hand use, as well as perceptual skills with body awareness and spatial concepts such as front, back, top and bottom.
What should my child be doing?
It is important to consider a child’s age or stage of development when supporting dressing skills.
First, children begin to help you dress them. They may hold out a foot for you to put a sock on or push their arms through their sleeves. Next, children learn to undress themselves by removing items of clothing that do not need unfastening. Then, children learn to dress without fastening, before they can finally dress and manage fastenings themselves.
All children are different but the table below gives an idea of the typical order that dressing skills develop. This will help you see where your child is at, and be realistic with dressing expectations and next steps.
This table shows the typical order of development:
1 year old
Helping with dressing, offering/ pushing/ pulling limbs
Moving to pulling off shoes and socks
2 year old
Moving to putting shoes, socks and hat on
Can remove most clothes
3 year old
Can pull large zips up and down (not starting)
Can pull bottom half clothes up and down for toileting
Puts on clothes back to front
4 year old
Can do socks and shoes
5 year old
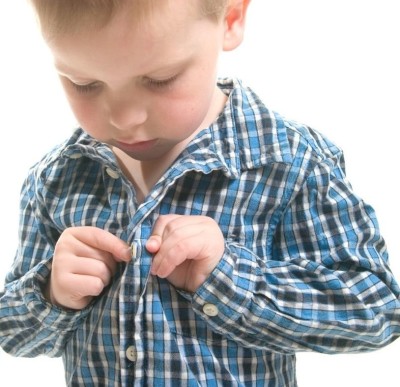
Can fasten and unfasten buttons
6 year old
Dressing independently
Starting to tie shoelaces
Think about your child
What are they motivated by? Does your child have a favourite colour they like to dress in? Or even a top with their favourite character on?
Think about the environment
Where is your child getting dressed? Is it at home, school or changing for swimming at the local leisure centre? Does your child perform better in a calm, quiet area? Is there somewhere to sit with back support? Does your child need to check in a mirror once dressed?
Think about the activity:
Is your child having difficulty putting their clothes on or taking them off? Practise and play dress-up games with fancy dress, bigger, baggier, or mum/dads clothing.
Is your child getting their clothes the wrong way around? Help them orientate clothing by having a logo or pattern on the front of their t-shirt, or encouraging them to feel for the label at the back.
Does your child get frustrated when in a rush? Always practise away from time pressures (e.g. avoid getting ready for school and practise at weekends).
Does your child get clothing in a muddle or appear untidy? Problem-solving together – do not correct them if they make a mistake but ask them what they need to do to fix it.
Tip! Always ensure the task is achievable. Break the task down into manageable chunks. Begin the dressing activity for the child but let them finish it off themselves. This is known as backward chaining.
Children learn to undress themselves before they are able to dress themselves.
Use clothes that are slightly bigger and have good elasticity. Let them dress up in your clothes and you try to put their clothes on.
Each time you help them get dressed and undressed, make sure the task is carried out in the same way in the same order so it becomes a predictable sequence.
Describe what you are doing as you do it. For example, “I am putting your left leg in, now your right leg in. Now you are standing as we pull up your clothes.”
As your child begins to anticipate the next steps, allow them time to cooperate in the process. For example, pause as their hand is placed in the sleeve and give them time to push their arm through.
Make sure all skills are broken down and appropriate for the level of skill and attention.
Remember to praise your child’s efforts, big and small. Use reward charts and make it fun!
Ensure your child is sitting in a stable position, they may find putting socks on easier if leaning against a wall or sitting on a chair.
Select socks that are loose initially. Stretchy socks made from nylon can be useful to start with. Start with a larger size and build up to a sock of the correct size.
Taking off socks
Start with removing the sock first as this is easier to master. Encourage your child to hook both thumbs into the sides of the sock and push down over their heel. Then encourage them to hold it at the toe and pull it off.
Once your child has mastered removing their sock, start practising putting the sock on.
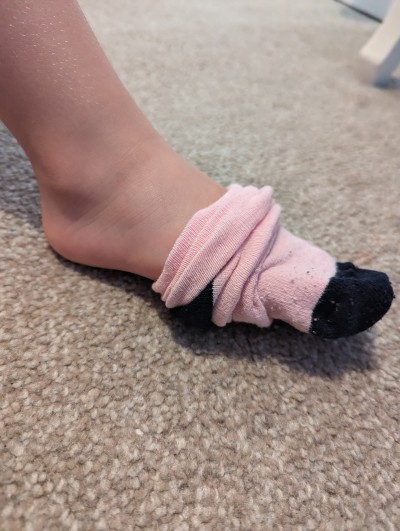
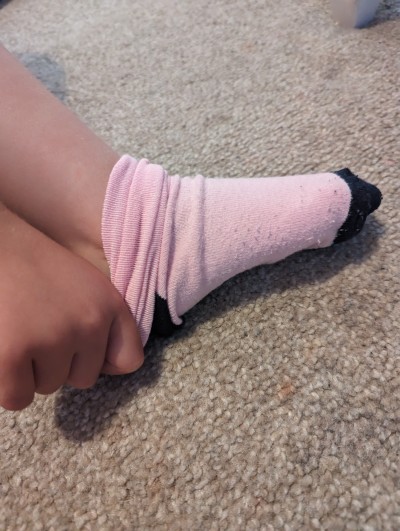
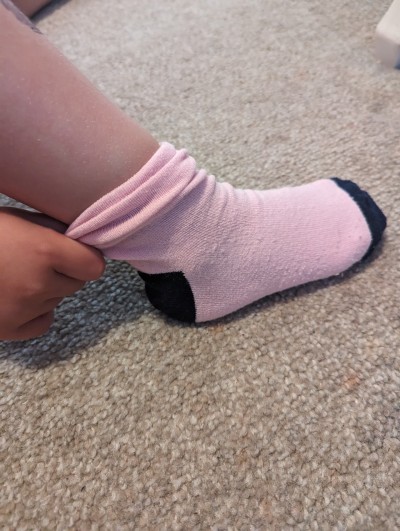
Prompt your child to check that the heel is underneath – socks with different coloured heels can be useful to begin with.
Help your child to gather up the sock close to the toe section, keeping the heel underneath.
Help your child to place the sock over their heel using your hands.
An alternative method is to turn the sock inside out push in the toe area and make a small pouch. The child can then be helped to peel the sock back onto their foot.
Using a backward chaining approach would be useful to help your child gradually increase their independence. Backward chaining teaches skills by breaking the task into steps. The adult assists with the initial steps and lets the child finish the final steps until they are confident to complete the whole task. For example with socks: 1- adult places sock over toes, 2- adult pulls over heel, 3- child pulls up ankle. Children who have the opportunity to learn and practice a skill have the satisfaction of completing the task and experience success. This means they are more likely to try again and keep practising!
It is important that your child is given regular opportunities to practise but that this is kept as pressure-free as possible. Evenings and weekends are a better time than when rushing for school in the morning.
For children to be able to fasten buttons and zips they need to be able to move their fingers and hands in complex, coordinated ways.
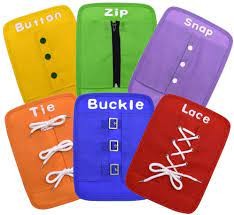
Activity ideas to support the development of fastening skills:
Practise unfastening first, once mastered, move on to fastening
Begin to include clothing with soft fabric and large buttons/zips in dress-up games
Practise with clothing placed on your child’s lap, the way round it would be if wearing. Place clothing on your lap and practise while sitting next to each other
Consider visual perception e.g. colour contrast between buttons and top, most school polos have white buttons on white tops which makes it hard to differentiate
Encourage the child to slow down and consider how the fastening works. Lots of children get frustrated and just pull at a button!
You could also use small bags, purses with zips, poppers, or attach different belts and buckles. Make small pockets and attach different fastenings to close them, e.g., different-sized buttons, hook and eye, Velcro, press studs and zips. Hide objects inside the pockets and encourage your child to find them.
Tips for Zips
Place keyrings on zips for extra pull support
Tips for Buttons
Do activities involving posting coins to initially build awareness of the mechanism required to fasten and unfasten buttons
Make a button snake, or fastenings board (using a piece of wood covered in fabric and attach various fastenings onto the board.
To help see the laces:
Coloured Laces can help your child see the different actions of each lace.
To help feel the laces:
Trial stiffer OR soft and wide shoelaces, this may be easier to work with than floppy laces.
Thick shoelaces also provide extra friction in the eyelets, which helps keep the starting knot tight while working on the tricky finishing bow.
Replace slippery synthetic shoelaces with ones made of cotton or other natural fibres, as these provide a better grip and also help keep the starting knot tight.
Make sure the shoes fit snugly. If the shoe is already nice and tight, the shoelaces don't have to be tied quite so tightly, making it easier to learn.
Sit comfortably and practice with a shoe on a table or lap, or with a shoelace or rope wrapped around the thigh, instead of awkwardly reaching down to tie your shoes.
Use a felt tip marker to permanently highlight the points on the shoelace that should be gripped together when making a loop or loops.
Knot the very ends of each shoelace to stop those ends being accidentally pulled through the knot (when tightening) or out of the eyelets (when loosening).
 01246 277 271